When an image layer is highlighted in the Layers Window, an "Opacity" button replaces the "Symbols" button in the right panel. That opens a dialog for specifying both overall image opacity and a specific color to be treated as transparent. The dialog can also by opened by right-clicking an image in the map view and choosing Opacity... from the pop-up menu. While the dialog is open you can scroll and zoom the map view as you make adjustments.
Making a digital elevation model (DEM) image partially transparent, say by choosing an overall opacity setting of 30%, can add an attractive shaded effect to a scanned topographic map just beneath it. Some examples of this are the topo/DEM file sets you can download for the Texas Hill County.
Also, a transparent color can be chosen to hide the solid-color margins of tiled, partially-overlapping aerial photos that have been reprojected. An error tolerance for matching the transparent color can also be specified, which would likely be necessary if the images were lossy compressed. (The "24-bit color images only" restriction doesn't apply to 8-bit paletted images that have been JPEG2000-compressed to NTI format.)
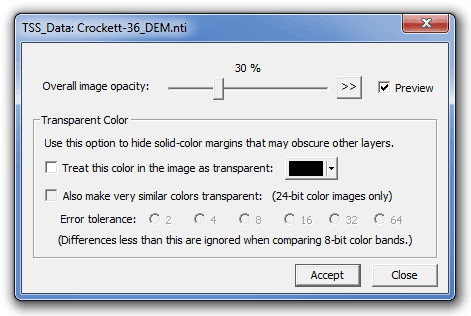
When the the Preview box is checked, the screen map will dynamically reflect your changes as you make adjustments. To actually change the layer's settings, however, you must click the Accept button before closing the dialog or invoking it for a different image. When adjusting opacity, you may want to uncheck the Preview box to suppress the dynamic map updating. Then, by toggling the checkbox, you can more easily compare the potential appearance with the one last accepted.